MASTERCRAFTERS STARLIGHT ClOCK
preliminary pageThis page details the restoration of a Mastercrafters Starlight Model #146 Clock
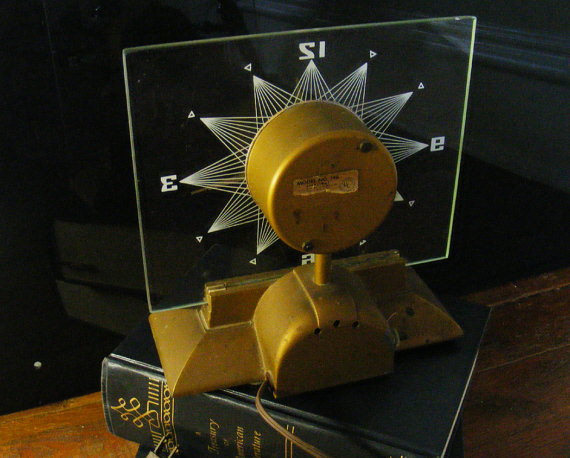
Here it is, as purchased

Here Disassembled, cabinet parts restored.
Cleaned, polished and clear coated where needed.
Clock mechanism cleaned and lightly lubricated.
Btw - The hands cap is pressed on with this movement.
I finally verified something I have been told but had yet to see, there is a version of this #11 motor / movement
that has a threaded hands cap. It's very difficult to tell them apart, there should be a small nut holding the minute hand in place
with the pressed on cap. This is not needed with the threaded cap as it tightens down to hold the minute hand .
Removing the pressed cap can be difficult to do without damaging the movement.
Removing the thread cap is easy, hold the minute hand and unscrew it.
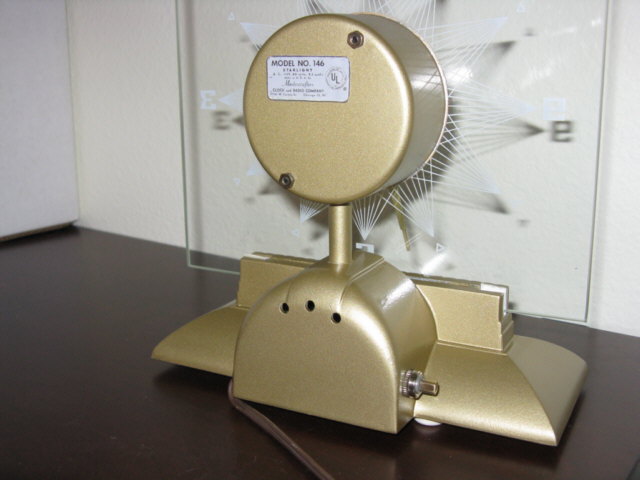
Restored back

Restored Front
I've added a enhancement, by installing blue gel under the glass and using a high output
LED lamp the effect is to turn the edges and clock face blue.
Parts:1 E12-x21 Candelabra LED Bulb (21 high power LEDS) from superbrightleds.com (thanks Steve Q.)
1 roll blue wrapping plastic from Party City stores
1 roll of 2" foil tape from Home Depot.
1 roll of 2" foil tape from Home Depot.
Photo below
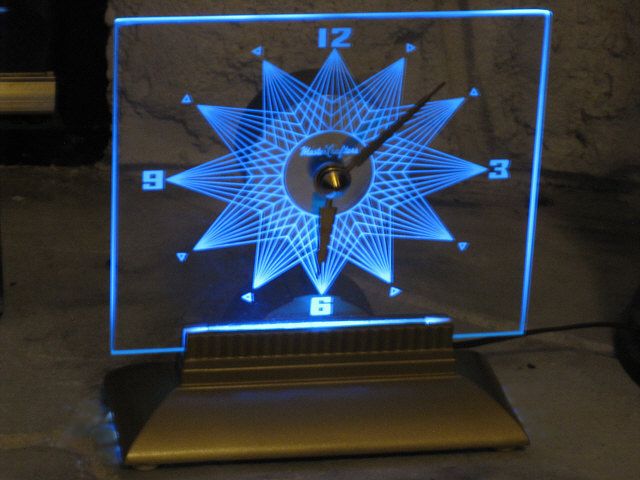
Note: the lamp is a tight fit , it is facing the glass in the middle.
Foil tape was used on the inside bottom of the base to increase light transfer.
That's it.
Possible future enhancement.
Ideally, a PCB should be used, fitted with ultra bright LED's the length of the bottom glass edge.
This would provide an even distribution of the light across the clock face.
However the bottom edge of the clock face will always be brighter .
The base would then have to be fitted with a supply to run them.

Recently I have been contacted by a few people working on these clocks. They have asked about help with the motors.
I have had mine stop running after a power failure. So I thought I'd post a little more info.

Of course it's important that the
entire area of the motor gearbox be clean , the area circled is
critical. Make sure the worm gear is clean.
Put a few drops of oil on the worm gear shaft, which is connected to the motor.
I would suggest not putting oil any of the gears themselves, however a drop on the shaft ends should be fine.
Putting oil on the gears themselves may attract dirt and help stop it running. Though this clock motor does not have a second hand to observe if it's running
observe the worm gear I've circled above. It's not obvious in this photo but the motor is actually running in the picture.
Finally, the back of the actual motor section can be taken off easily, and a drop or 2 of oil put under the wheel you will see there on the motor shaft. It must go under the wheel to reach the bearing surface.
Email me if you have one of these clocks and you want to have it restored or need help in doing it yourself.
Email Steve