![]() GETAWAY
PINBALL
GETAWAY
PINBALL![]()
HIGH SPEED II
This page describes repairs and enhancements made to my Getaway
pinball machine to date.
![]() GETAWAY
PINBALL
GETAWAY
PINBALL![]()
HIGH SPEED II
This page describes repairs and enhancements made to my Getaway
pinball machine to date.
This game required a fair
amount
of work.
Including:
Replace damaged translite
Replace damaged translite
light
board with lamp sockets and lamps.
Replace broken "miniature"
traffic
light
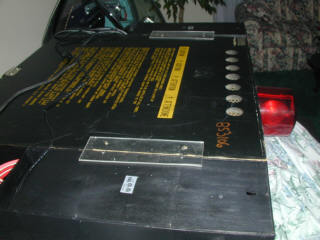
Replace damaged side rail
Replace "gassed" display -ouch!
Touch-up playfield
Repair lockbar holes and
cabinet
artwork
Repair power supply for ball
accelerator
PLUS
Normal Rubbers,lamps,remove
ramps and polish, etc, etc.
The "Project" part of this
got started after discovering a page on the net where Scott
Weiland had taken a real traffic light and connected it to The
Getaway. I
thought,
that's a great idea!. Instead of a "real" traffic light which was
just too big and heavy for my use,
I started a search for a suitable substitute. I found one. An
importer
has been marketing a plastic traffic light that is sold for "party" use.
I assumed that dc lamps were
used and interfacing the light from the game would be a bit easier than
what
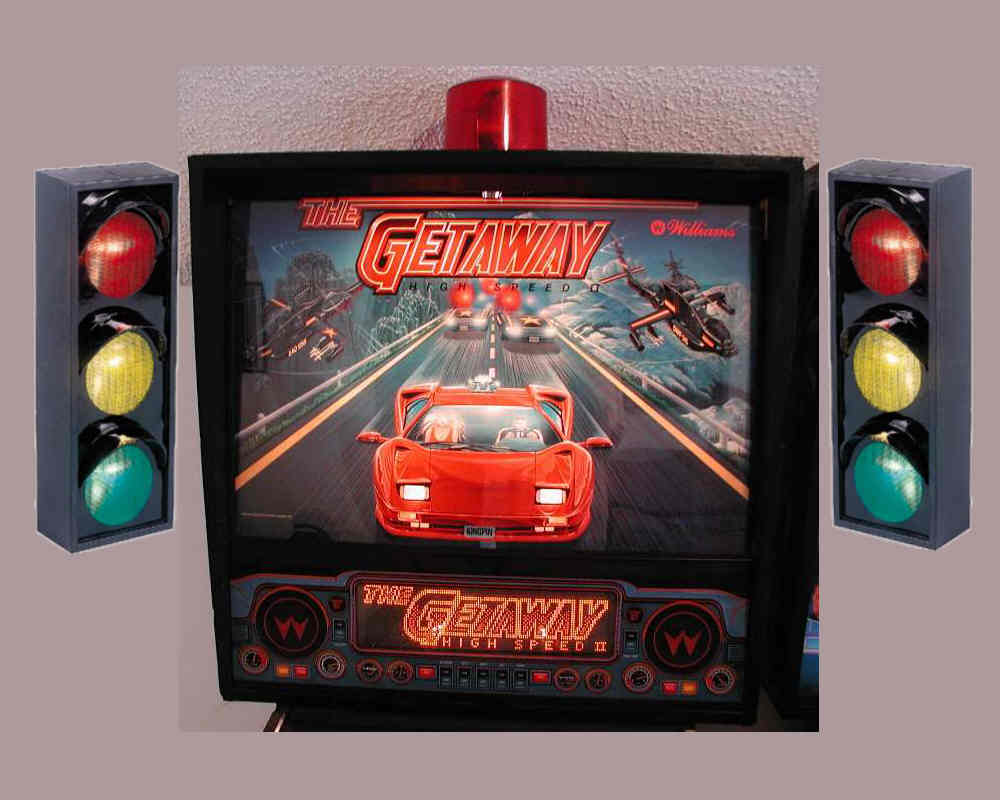
Scott had done on his "real" traffic light mod. I created a
"mockup"
drawing
of what I thought it would look like, before ordering them. Here it is:
I was happy with the way it looked so I ordered the lights. When they showed I dismantled them and found they had used xmas style bulbs and sockets (7 1/2 watt). Since the lights were already wired for AC and modifying them would be fairly easy I decided to go with the Opto isolator/triac approach Scott had used on his "real" traffic light.
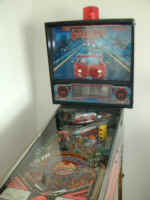
Here are some pictures of the project.
Click here for additional pictures of the mod
Check Scott's page for the Schematic and parts listing for the driver board needed to interface with the game.
Here is a Link to Scott's Page!
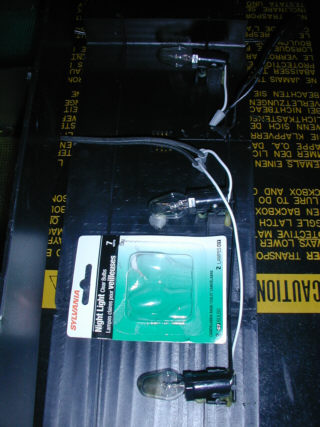
The first step was to alter the "New" traffic
lights
for my use.
This was done by opening each light and removing the
pressed on wire cap connecting one wire to each lamp and one cap for
the
common side of the circuit.
The reason for this is the lights as sold use
"twinkling"
lamps and are connected in parallel.
Which means basically that the different colors
(red,yellow,green)
randomly light after power is applied and the filaments warm up. This
gives
the appearance that the lights are changing.
After each lamp is disconnected from the other an
additional wire was connecting to them which will be used as the
control
for each individual color. Since both traffic lights light together for
a specific color the lights in the traffic lights are wired and then to
each other in parallel.
The harness for the lights was connected to the
control
board using wire nuts as were the wires inside the traffic lights.
Connectors could be used instead.
The control board on the other hand (see link to
Scott's
page above) was connected to the game using a molex connector, so it
can
be removed from the game bottom easily when transporting the game. Also
the harness that connects the control board to the game itself at the
miniature
traffic light side is connected with a molex also so the entire
additional
harness can be removed if desired for whatever reason. I did not
have the correct connector to make an adapter to connect the
miniature
traffic light directly to the new harness so I connected a socket
directly
to the playfield light (this is also color coded -red to red on
minature
light etc). This socket is what is used to connect the new harness to
the
game.
This mod also winds up with an additional AC plug
used to drive it. So it requires use of an additional wall outlet.
Color coded wire was used to make all connections so that any errors or
problems
could be easily traced. (red for red light etc etc)
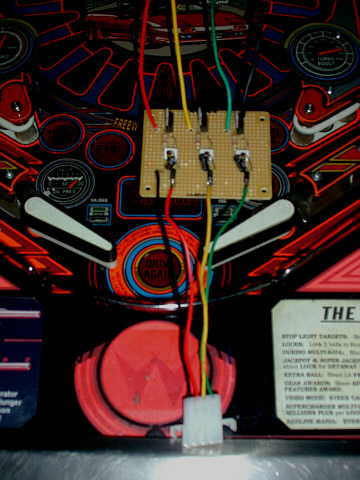
I wanted to make the mounting to the game as simple
as possible as well as cause as little "damage" as possible. I chose to
mount them to the back surface of the backbox. I cut two pieces of
Plexiglas
and drilled holes on one edge to match the holes used to put the backs
on the lights. A second set of holes were made on the other side to
allow
the traffic lights to be attached to the game. (see picture) The
smallest
screws that would work were used (2ea side). This allows the lights to
be mounted flush with the back surface of the game head and does not
damage
any art on the game.
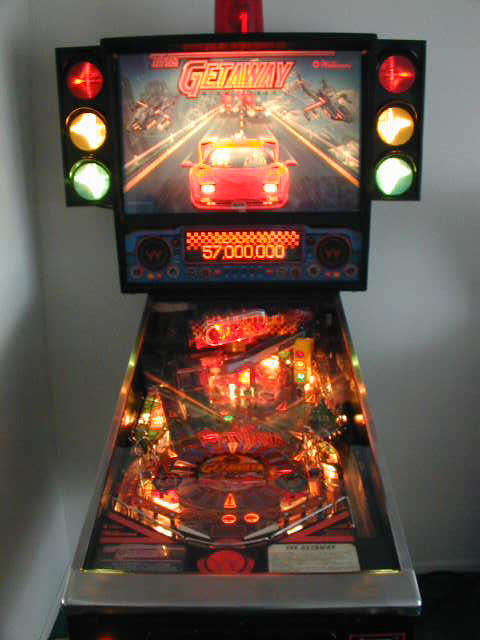
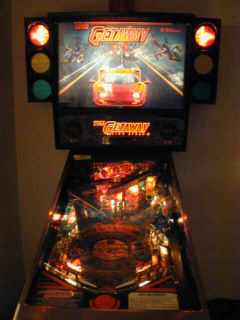
As you can see it looks like it was shipped with
these.
It's a great enhancement for the game.